Monday, 30 August 2010

Picture

Hi
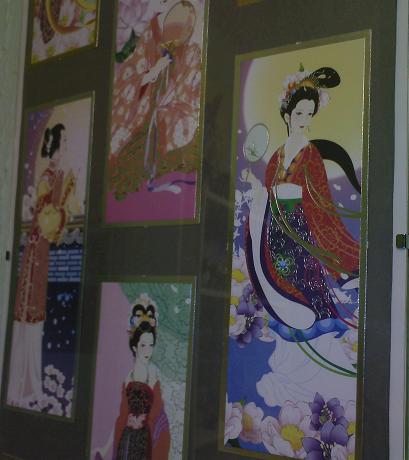
I came across these pictures a couple of weeks ago and have finally got range to putting them into a frame.


They look gorgeous on the wall but the photos are blurring slightly due to a bit of curvature in the frame.


Here are some close ups.


Monday, 23 August 2010

Latch Hook Rugs

Hi
I've opened my next rug kit. I decided to have the dog one. As I suspected there were a lot of very close shades. This made it difficult to tell which was which at a glance. I decided to lay out one of each colour and name them for easy reference.


I had to do a bit of guess work as to which colour is called 'spice' so I hope I got it right. I think so from the picture.


I have bought a set of small boxes and separated the colours into these. I have added their code sign into the box. This has made finding the right colour quickly much easier.


I have completed a few lines and I must admit that this kit takes a bit more concentration than the previous ones I have done, but I think it will be worth the extra effort.

Saturday, 21 August 2010

Wizards Tower

Hi
I have finally put my dragon into a fiery pit. It's more a pit full of larva really because I don't have any effective looking flames at the moment. I am working on some ideas and will add them in later if they turn out OK.


I managed to get some red and pink stones and used a plate with a lip to try to give the impression of emerging from a pit.

I placed the figures around the tower to make it look as though the mages were summoning the dragon.
The background is the inside of a Lord of the Rings folder.


I placed a crow from the Golden Compass set on the top of the tower. You can see him here blue tacked on to see the effect. I am going to glue him on when I'm happy with the scene.


I bought this dragon candle holder on a visit to Hampton Court and used it to represent a stone statue of a dragon sitting near the pit. I found a were raven and placed him on top as if he had just landed there.


I find winged creatures fascinating.


Overall I think there are many ways to improve this scene but I am quite pleased with it so far.

Friday, 20 August 2010

Hamma Beads

Hi
The next thing I tried after the game icons were some X men characters. I only did a few because although I think they are very effective you will notice that I had a problem with the base warping.
Here are three of the ones I completed.

Wolverine


Storm


Gambit


The problem appeared to be caused by the final ironing after removal from the board.

Thursday, 19 August 2010

Fairies

Hi
I bought a few more packets of the Disney Tinker Bell Fairy set but didn't get any new ones so was a bit disappointed.
When I was out today I found some packs that contain two fairies that are both visible. They were in a sale at The Entertainer. I managed to pick up the ones I wanted, although I still had to accept some repeats.
Here are the new ones.
Silvermist


Rosetta


Lyria


Tinker Bell


Tinker Bell with Kitten


The Queen


The ones in the visible packs did not contain their name cards to complete the picture but I am more interested in the models so I don't really mind that.
This is one of the visible packs I bought today.


You can see Fairy Mary still in the packet.

Fairy Mary


I hope you agree they make a charming set.

Tuesday, 17 August 2010

Schielch Animal Miniatures

Hi
I have collected my final set of animals together to make the pond scene. I have found some grass paper in Model Zone so am ready to put the scene together. I thought I'd show you the new additions to my collection before I completed the scene.

Deer Family


Hedgehog Family


Chickens


Squirrels


I hope you like them. I think the baby animals they do in this series are gorgeous.

Monday, 16 August 2010

Hamma Beads

Hi
Hamma beads became popular a while ago now but I still do the occasional one. I love the pixel art effect and have been experimenting with achieving the same effect in other ways. When I first tried out Hamma beads I couldn't decide whether to use the small, mini beads or the medium, midi beads. I think the mini beads make very cute pictures but they are difficult to handle. I found it necessary to use  tweezers to place them and they would even move by static as I covered them ready to be ironed. Consequently I settled for the midi size. I started with some icons from a game I was playing at the time called Gemsweeper which were small and simple.


I found achieving a good end result unpredictable, and in fact still do. One other problem I find is that some of the beads tend to expand into rings as you can see if you look at the edge of the Easter Island statue.
I will show you some of my later attempts next time.