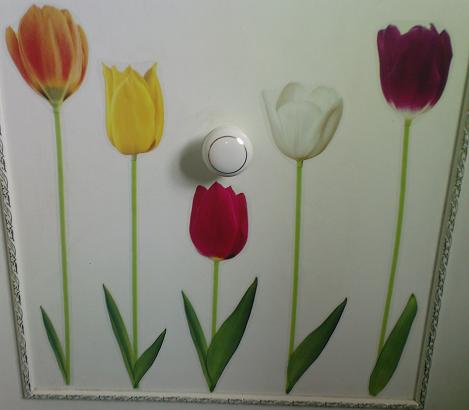
Friday, 11 February 2011

Art Club

Hi
Went back to my art class again today and had to draw a tiger. I find faces very difficult because I can never seem to balance the eyes. Had two attempts.


With this one I was practising drawing eyes so didn't bother with too much else.  As you can see they are not the same shape. I used coloured pencils and then blended them with a blending pencil. I think this works well. I tried to make the eyes stand out a bit with a burnishing pencil but I don't think the effect is very noticeable.

I also tried a full head.


I'm not convinced I like this one. It's not quite right. I do use a bit of coloured graphite for the shadows and deeper shades. I like the effect. The graphite ones really need fixing though so I have a spray can of Winsor & Newton Artists' Fixative for charcoal, pastels and pencil drawings. This works really well. It doesn't crinkle the paper or produce blobs.
Next week we are going to draw a whole tiger. Today it took me two hours to draw the face!

Monday, 7 February 2011

Art Club

Hi
Changed my computer so have not been on for a while. On Friday I went back to the drawing lessons and had to draw a butterfly on a leaf.


I drew it using a 6B pencil and then used water colour pencils to colour it. I have found it easier to use a brush to remove the colour from the pencil and then colour as if painting. If you want a graduated colour effect then using the pencil directly onto the paper and then spreading it out with the brush works fine but for anything else I prefer to simply use the pencil as a source of paint. The pencils are very easy to carry around and clean to use. A brilliant idea.

Saturday, 22 January 2011

Art Club

Hi
I had a go at drawing a jacket today to try out my new skills. I drew the jacket from a picture for Jan 7, 8 & 9th on Water Colour calendar by Max Ruppeck.

I think it does look more like actual material and I think you can tell the man is fat which is good.
I drew it with a 4B pencil and then used my onyx medium pencil to shade it.

Friday, 21 January 2011

Art Club

Hi
Today I had to draw some folded material hanging on a post at the art club. I hope it will improve my ability to draw clothes which up to now seem to come out very flat and two dimensional. Here is my effort anyway.


I used my onyx pencils which I enjoy drawing with because they are soft and produce good shadows.

Wednesday, 19 January 2011

Art Club

Hi
I had to buy some Unipin waterproof fine liners to take along to my art lessons. I ordered a pack of five, 0.1, 0.3, 0.4, 0.5 and 0.8 from Amazon. They arrived today. I had already tried out my Derwent Sketching pencils. These are water soluble and give a wash effect in greys. I drew this baby penguin from a model I have.


I really like the effect. I find I can use them with the water colour pencils to add shading as well.
I decided to draw a boat from my Water Colour calendar, January 5th & 6th, from a painting by Molly Squibb. I drew the boat, outlined it with my 0.8 pen, and then used the water sketching pencils to colour it rather than the colours the artist had chosen. The boat is sitting on the beach with water lapping round the end. 


Sunday, 16 January 2011

Latch Hook Rugs

Hi
I completed my sixth rug today. This means that I now have enough squares to put them together to make one rug for my bedroom. I laid them all in a line under the window while I was waiting to complete this one and have become so use to seeing them there that I might just leave them like that for a while.

Saturday, 15 January 2011

Art Club

Hi
For Christmas I had a set of Derwent Water Colour pencils. I tried them out today and I loved them. For the very thick outlines I dipped the pencil in water and used it straight on the paper but for the rest I wet the brush and rubbed it over the pencil to pick up the colour. I did try colouring with the pencil and then spreading it but I prefer to brush the colour onto the brush first and then apply it to the paper. I find this doesn't wet the paper too much.


I bought a Watercolour Calendar and drew this rose from the picture for Jan 3rd & 4th which is called 'Red Rose' by Dennis Pendleton. The pencils work well and are easy and clean to use.

Friday, 14 January 2011

Art Club

Hi
I have started an art club to learn how to draw. I have never done any drawing before but hopefully I will get better as the lessons proceed. Today we had an exercise involving tone. This means using a pencil and shading from dark to light. Then we had to draw a few objects that we had with us and shade the one at the front really dark and get lighter towards the back to supposedly provide a three dimensional effect. So I thought I'd let you see my attempt. LOL.


I used Derwent onyx pencils. They are soft and shade well.

Saturday, 18 December 2010

Mermaids

Hi


While on holiday I picked up a few small models of mermaids which set me thinking. So I looked around and discovered Model zone sold even smaller ones.


I found a perspex container that I had received as a present containing soaps etc and painted the inside of the base blue using glass paints.


I looked out an old shell I had collected years ago on the beach and cleaned it up and added a glass stone.


Next I needed something to represent water. After searching I discovered Hobbycraft sold packets of E-Z Water for woodland scenes. This is 'non toxic, low odour product which requires no measuring or mixing and hardens in minutes.' Sounded about right for me to have a go with.


So armed with a heating pot (which is for cooking individual puddings in) and a pair of pliers I set about melting the globules to make water.


I dropped in to the tank a few sequins and small blue shells that I had found in The Works for making cards along with crushed glass and glass stones for the bottom of fish tanks.


Unfortunately I didn't heat enough water globules the first time to cover the whole base. The packet was absolutely spot on when it claimed the product to be quick drying and before I had heated extra the first lot had set hard so giving a permanent line across the bottom.


I added a small pearl star, the shell and more sequins, and determined not to make the same mistake filled the small bowl this time. I'm not sure what the problem was but the water started pouring well but seemed to cool as it ran along the sides of the shell. This meant that I ended up with an uneven layer that didn't cover the whole base. Undeterred I heated a third bowlful and poured it into the missing corners and allowed it to overlap the shell on one side. I was hoping that this would look as though a wave was lapping into the shell. I'm not sure it was totally successful.


I think layering the sequins and tiny shells gave it a bit of depth as did painting the base darker than the sides. On reflection I think I should have painted it much deeper blue on the bottom and much higher up the sides. I added the mermaids afterwards. I had intended to partly submerge a couple of them to make it look as if they were swimming but after a previous attempt with heat and small figures I thought better of it.


The overall effect is not too bad and I learnt lots, so I am happy. The water was a bit disappointing since I thought it was going to be clear but as you can see it turned out rather yellow. Still next time I know to try adding a bit of colouring to the water itself.

Thursday, 9 December 2010

Holiday Memories

Hi
Just a few pics from when I was recently at the sea side. It was a bit cold and wet but boarding house was comfortable and friendly. Thought I would share a couple of memories with you.
On the pier there was a sea life place where you could feed the fish. They were keen and came right up for the food. This is not a particularly clear photo but you can make out the turtle swimming among them.


There were also a couple of abandoned ducklings enjoying the attention and pinching the fish food as well.


The first evening we went for a walk and I saw my first ever double rainbow. The second rainbow isn't as obvious in the picture as it was in real life but you can see it.


Finally on the way home we pulled into a station and there was an old steam train on the next line surrounded by enthusiasts.


I had a relaxing and enjoyable time and still managed to buy some tee shirts with pictures of horses and wolves on them even though it was too cold to wear them out.

Wednesday, 8 December 2010

Latch Hook Rugs

Hi
I have completed the horse kit.


I think this this is the best looking one so far. The wool is very soft and lovely to touch.
I am going to choose another animal one for the final square.

Wednesday, 13 October 2010

Hamma Beads

Hi
I started a collection of wolves in Hamma beads. My favourite is the brown wolf.


I think the shadow is very effective.
I put it in a frame and hung it on my wall with the other two I have completed so far.


I made the backgrounds blocky and I think it works well with the brown wolf.


On reflection I think there is too much black in the background for this one.


I tried to go for placing this one on the steps to a temple but it probably makes the background too fussy.


I think there is something primal about wolves. I am thinking of trying one in green but haven't been able to find olive green yet.

Saturday, 25 September 2010

Latch Hook Rugs

Hi
I have completed my dog rug. I am very pleased with this one.


I have been back to Hobbycraft and found another animal one. This time it is a horse.


It contains the wool or yarn,


the canvas,


and the instructions.


This kit also contains the latch hook itself although not all kits do. This only really matters when you are buying one for the first time or need a special size.
I'll let you see how it turns out.

Wednesday, 8 September 2010

Stickers

Hi
When I was out at the week end I saw some stickers for wheelie bins. I thought they would look good on my cupboards. I already have a couple of cat stickers I purchased from B&Q months ago.


Some Disney stickers I bought a couple of weeks ago.


Finally a bird cage I got last week. This one came as multiple pieces that had to be put together.


I think they cheer the room up but will have to stop buying them since I am running out of space.
Any way here is the most recent pack.


In this one the individual pieces needed cutting out.


Here is the finished arrangement on the cupboard door.